Sassy Sista's Designs
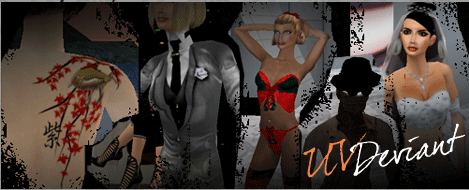
UVDeviant (UVD) is a group of independent users who create many services within Utherverse to improve users virtual life experience, such as offer a very large variety of avatar custom clothing you can wear.
How To Shop UVDeviant *special thank you to Jarvis for this great tutorial*
Step 1 - head on over to http://www.uvdeviant.com/ and login. Or
if you have not registered yet, do that first.
Step 2 - First
you need funds in your uvdeviant account, so click Account Options on
the side. http://www.uvdeviant.com/?page=23.
There you will see your UVD Unused Balance.
You need to add funds to that. So how do you do that?
Step
3 - Open a new window and go to your social center. Login and then
go to the UVDeviant Profile. http://www.utherverse.com/net/profile/view_profile.aspx?MemberID=91399549.
There you see the Message Center and the text link send me funds. Click that. http://www.utherverse.com/net/profile/RayTransfer.aspx?MemberID=91399549.
Step
4 - Transfer funds. Enter your PIN
number, and if you forgot it there is a handy link right beside
that. Then the amount of rays you want to transfer in the next field.
The final field you can leave blank, but I like to put down a reason in
case I need to check my records. I'm going to put "Tutorial" as the
note. Then hit submit transfer.
Step 5 - Now go back to
my home. Look down at the section Your Rays,
there is a text link Transaction History
under Bank Account. Click that.
There you see your transaction history.
Locate the one you sent to UVDeviant. There is a Trans ID number. Copy that number down.
Step 6
- Return to the UVDeviant site. There is a place on the page that
says Add funds with Transaction ID:
Put the number that you just copied in there. Then press claim.
Step 7 - Now I have
some money to go shopping!
Step 8 - Click the UVT Style Catalogue button on the page. It
takes you to where all the outfits are. Here you can browse the most
current releases, use the Designer List for a particular designer. Use
the Search feature to look up any key words. Browse by gender. Browse
by Price. Or Browse by Category. In this example I am going to select a
designer at random from the drop down list. Well what do you know. I
selected Rasa Designs and it loads all of his textures.
Step 9
- You can further tailor your search by selecting the options. So I
am going to select Male, as I don't want woman's clothing. Then after
that I will select 1-50 rays, for the price range I want to spend. Once
that is loaded, I simply can click the thumbnail of an outfit and look
at the details. Some outfits even have multiple pictures.
Step
10 - Now a bit of advice, if you are not too sure about the details
as the image might be small, and wonder how it will look on your avi;
there is a handy VWW link that can be
used to go in world to the designers shop. If they are there, then you
can ask the designer to display the outfit in question for you.
Failing that you can always message them directly to schedule a time to
meet. There is also a link to their social
center within these details. I find it wise to ask all questions
first before purchase. This way you won't be disappointed.
Step
11- Satisfied that I really really NEED this outfit. I click the Buy button. There is a confirmation notice
given. For example mine says. The seller
is asking ®35.00 for this item. You currently have ®218.00 Would you
like to authorize this transaction? From there I click Yes, as I
know I need this outfit asap! A moment shall take place and once it is
complete you will get another notice. This outfit has been added to "My Styles Wardrobe". To close the pop
up window click the x button in the top right.
Step 12 - Lets
say I'm a shopping freak, and I can't even remember that I already
bought this item. Well if I attempt to purchase it again, when I click
to view the item it will state This outfit
has been added to "My Styles Wardrobe".
Step 13 - Okay
so now moving on. My styles Wardrobe
text link is found in the upper right corner. Click that. Now my
Wardrobe shows up with a list of styles. I locate Vest Outfit Dark, as
that was what I just purchased and click it. A thumbnail appears of the
outfit to the left and the code is displayed on the right. Hmmm.. but
all the information is yellow. What does that mean? Oh look, it states
that Yellow means it is not yet ready to
wear, and that I have to wait 5 minutes. Sounds like a good time
to grab a snack.
Step 14 - Okay after that short break I
am back. I return to the my styles page. All of the information is now
green telling me where to put it on my avatar.
Step 15 - Open
a new window, or if you have not closed it go to your social center
profile. Click Edit Profile and then
in the sub links at the end is Avatar.
Click that. There you see your avatar
properties. Take the information from your wardrobe on UVDeviant
and copy and paste them into the proper areas on your avatar
properties. Each skin layer you must select
the drop down menu at the end and change it to UVTextures.
Leave the mesh layer to Public for the drop down.
Step 16 - Scroll
down to the bottom and hit Save Changes.
After that go up to the top, and add an outfit
title and then hit save outfit.
It is now ready in word in your closet to select and wear.